Step 1 – Install and configure Rsyslog
To install rsyslog on Ubuntu execute this from a terminal window:
sudo apt-get update

sudo apt-get install rsyslog
check if rsyslog is running:
systemctl status rsyslog
Once installed we need to open port 514 at on the rsyslog config file:
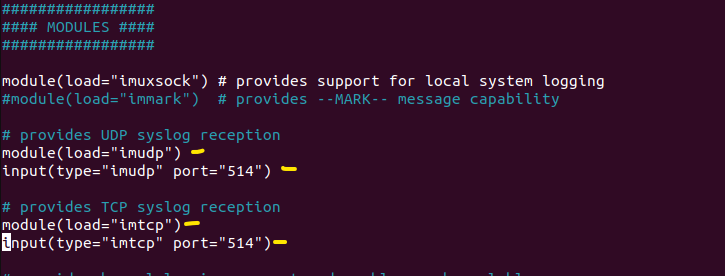
sudo nano /etc/rsyslog.conf
Uncomment the lines for udp and tcp port binding
restart rsyslog
systemctl restart rsyslog
verify that 514 tcp ports are open
netstat -ano | grep 514

–
Step 2 – Install Azure Arc
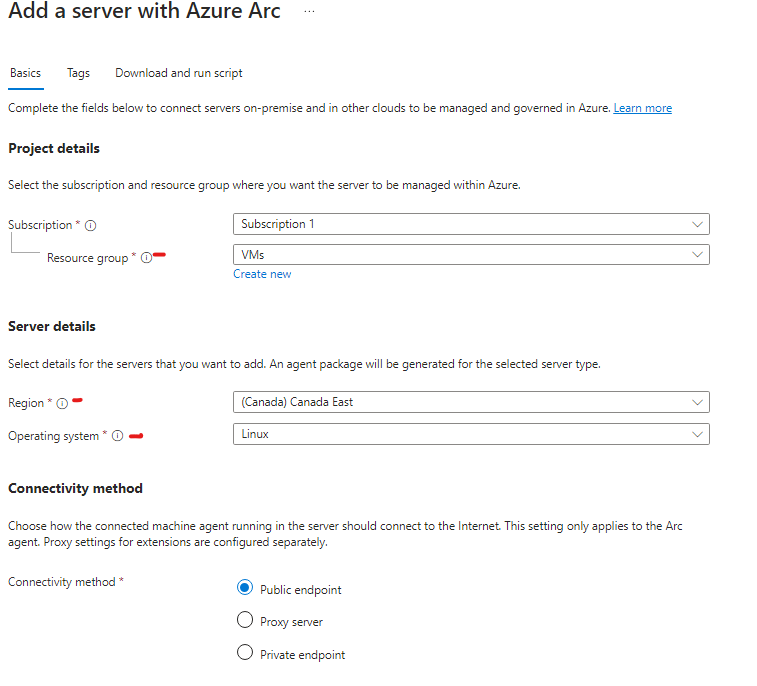
In Azure to Azure Arc > Add resources > Machines > Add a machine
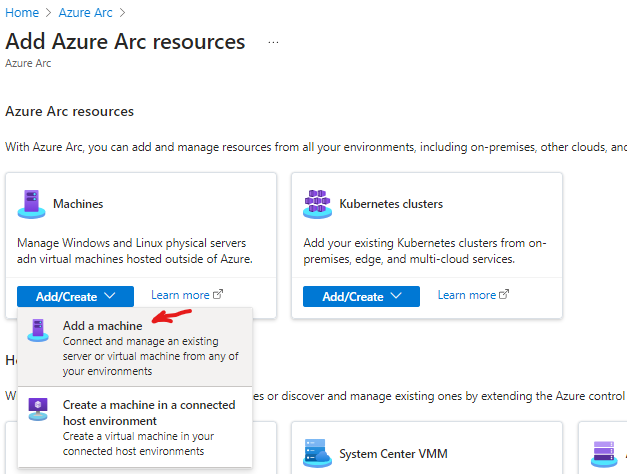
Add single server > click on generate script
Enter the appropriate configuration for your deployment
Click on copy or download generate script (In my example I will copy it)
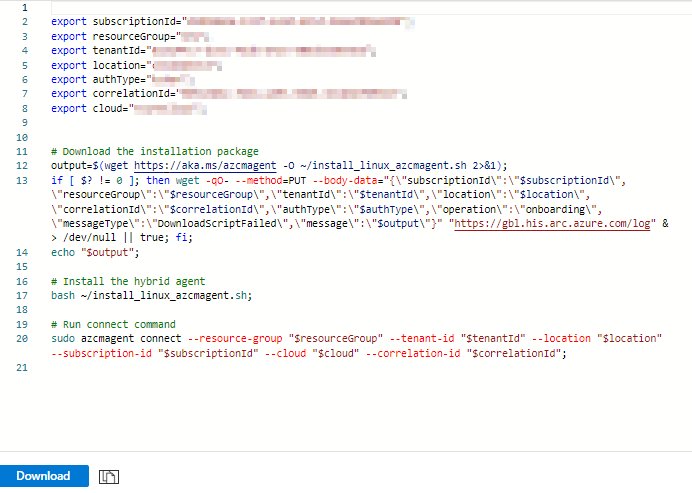
Paste and run it on terminal on the VM you would like to onboard
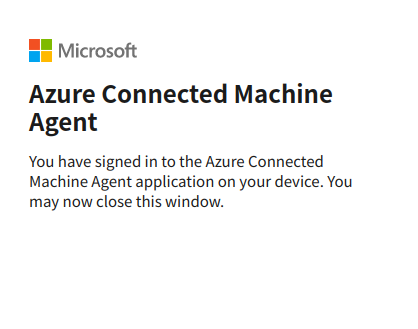
you will be prompted to enter a code to authenticate

then you will be prompted to login, after successful login you should see this message
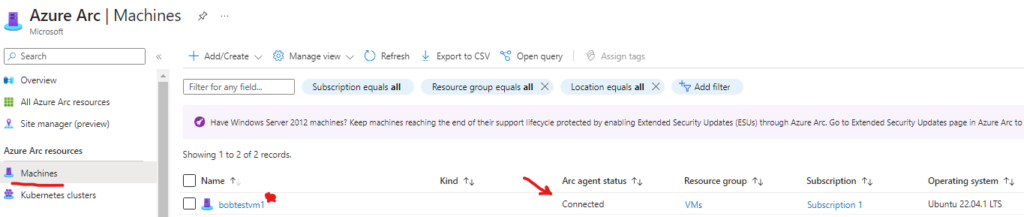
as we can see below we can now go to Azure Arc and verify that our VM shows up and status is connected.
–
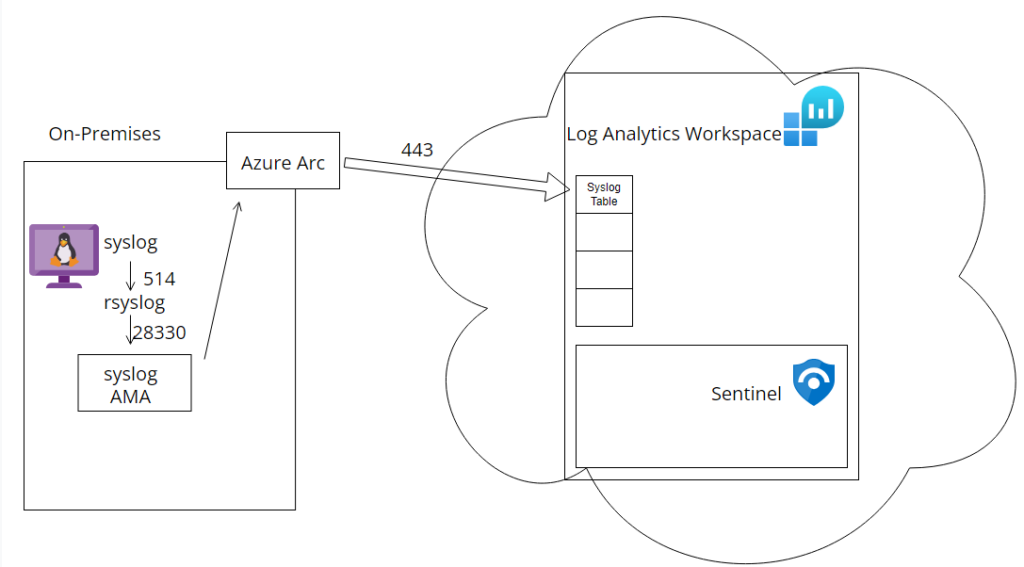
Step 3 – Install Syslog Data Connector on Sentinel, Deploy Syslog AMA Agent to on-site VM
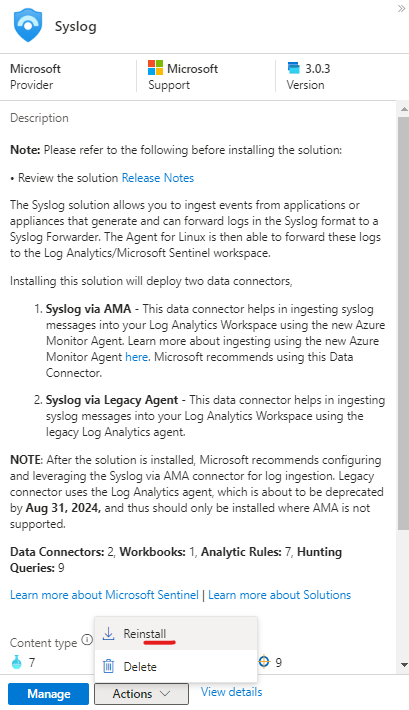
Go to Sentinel > Data Connectors > Content Hub
search for syslog, change the provider filter from “All” to “Microsoft”

Select Syslog, click on Actions > Install/Reinstall
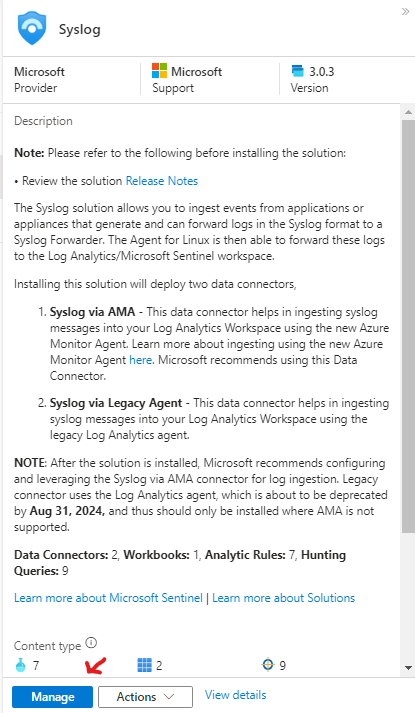
Once installed select Syslog again and click on Manage
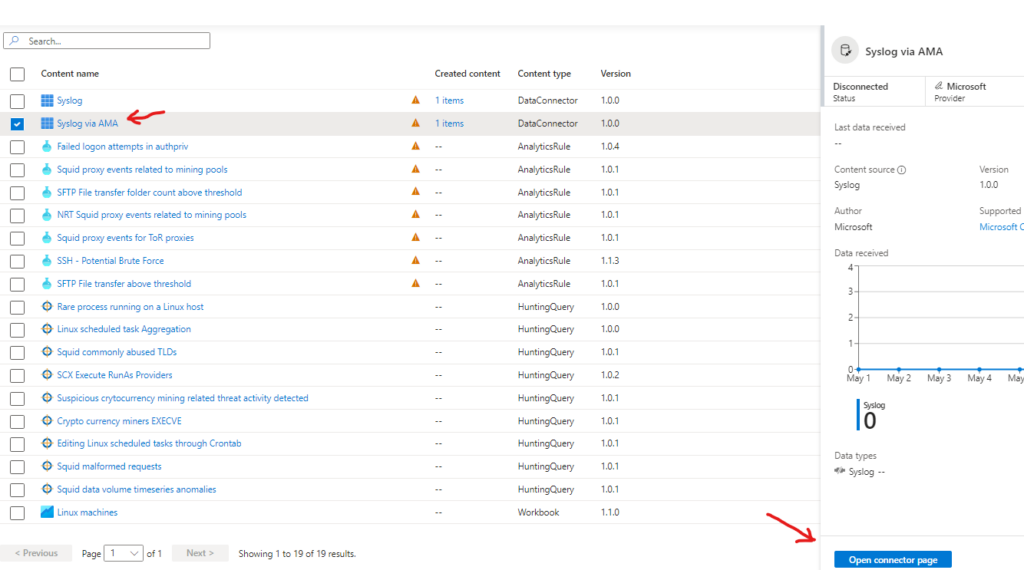
Select Syslog via AMA and click on Open connector page
Click on Create data collection rule
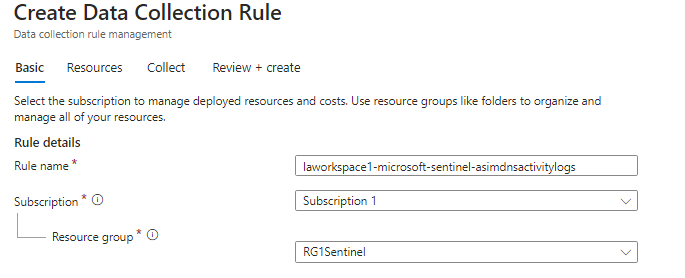
Select your resources (VMs you want to collect syslog logs from)
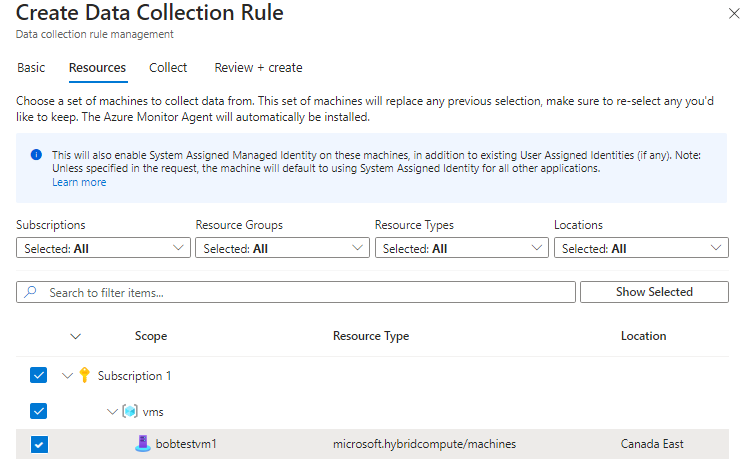
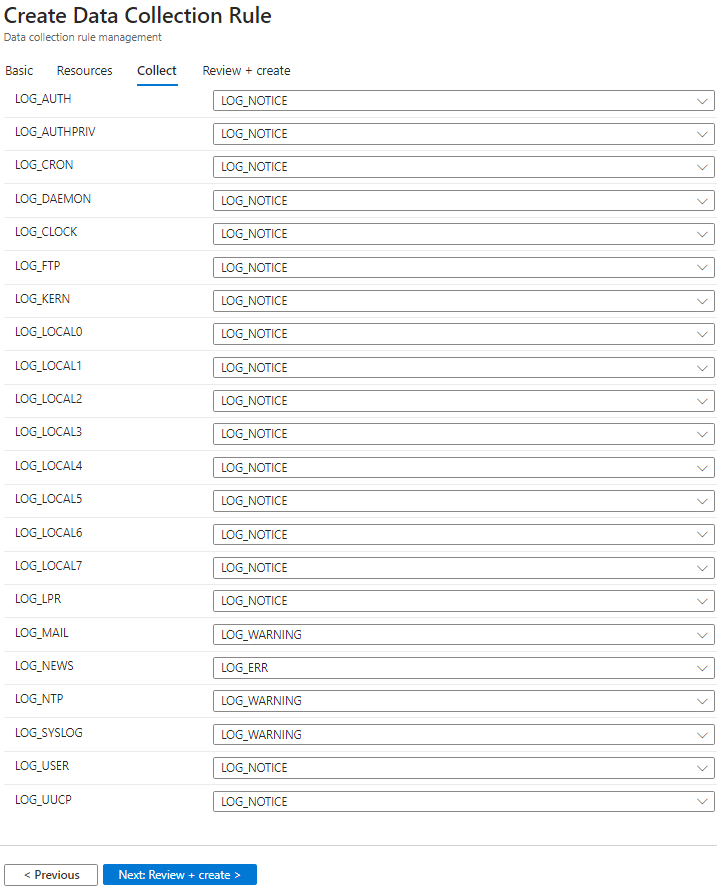
click review + create, once the review passes go ahead and create the rule.
You may have to wait a couple of minutes and refresh the page a couple of time until it shows as connected
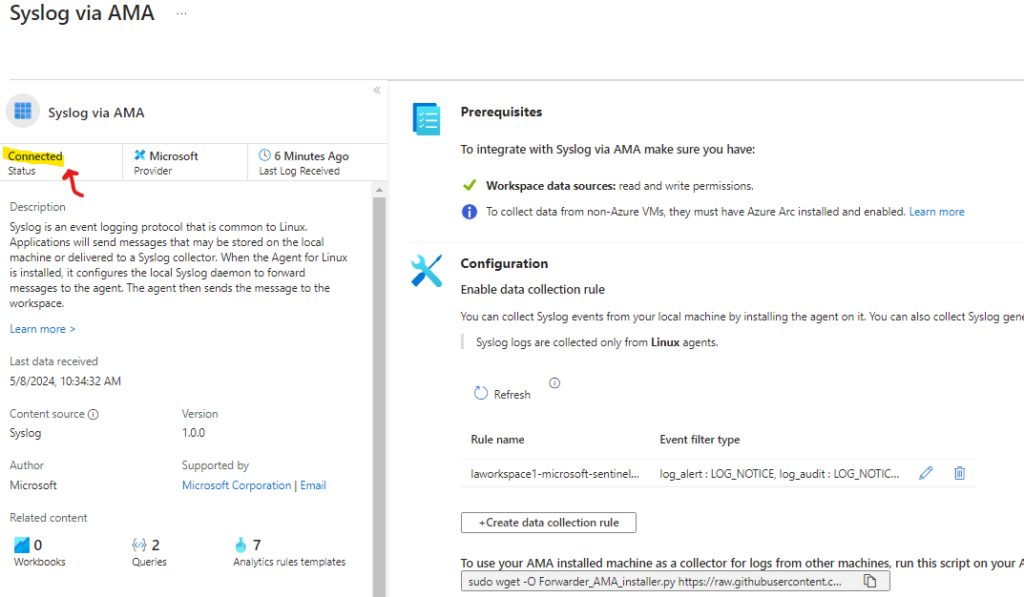
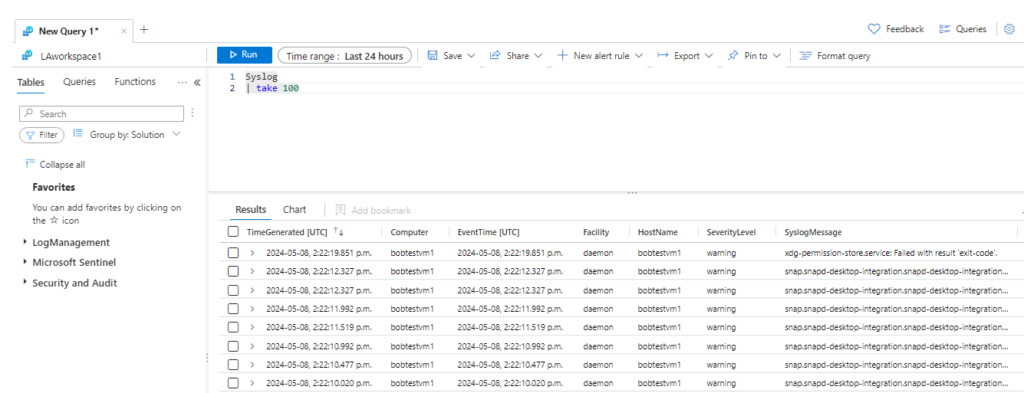
we can also verify we are getting logs by checking the syslog table query results on Sentinel.