Wazuh(XDR), Shuffle(SOAR), TheHive(Case Management), Digital Ocean Cloud(PaaS)
LAB 2: Detecting failed SSH attempts, automating email and block attacker IP option using Wazuh and Shuffle
Create Ubuntu VM Droplet on Digital Ocean Cloud Platform, install and configure Sysmon and Wazuh agent
We will create an Ubuntu machine with the most basic configuration options

Once created go to Network > Firewall > Droplet and add the Ubuntu Droplet VM to the Firewall rules and Add Droplet
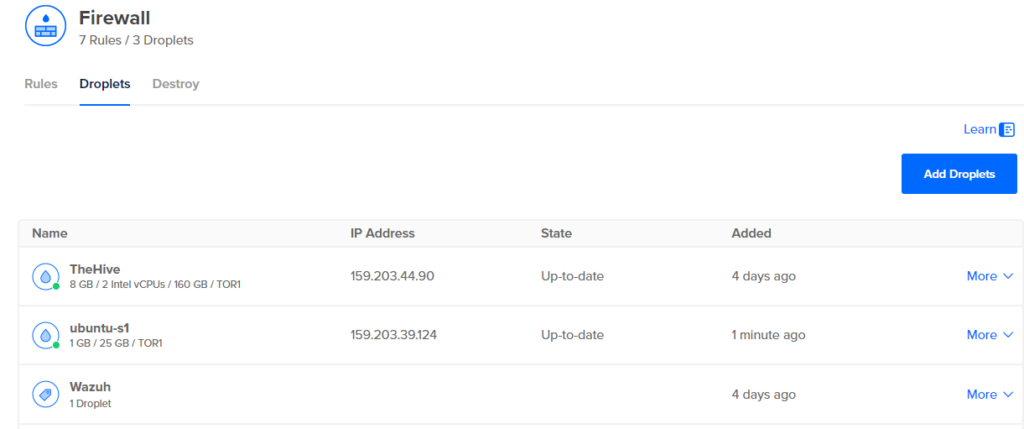
Now go to Manage > Droplets > select your new Ubuntu Vm > Networking > On the Public Network section under Reserved IP click Enable now

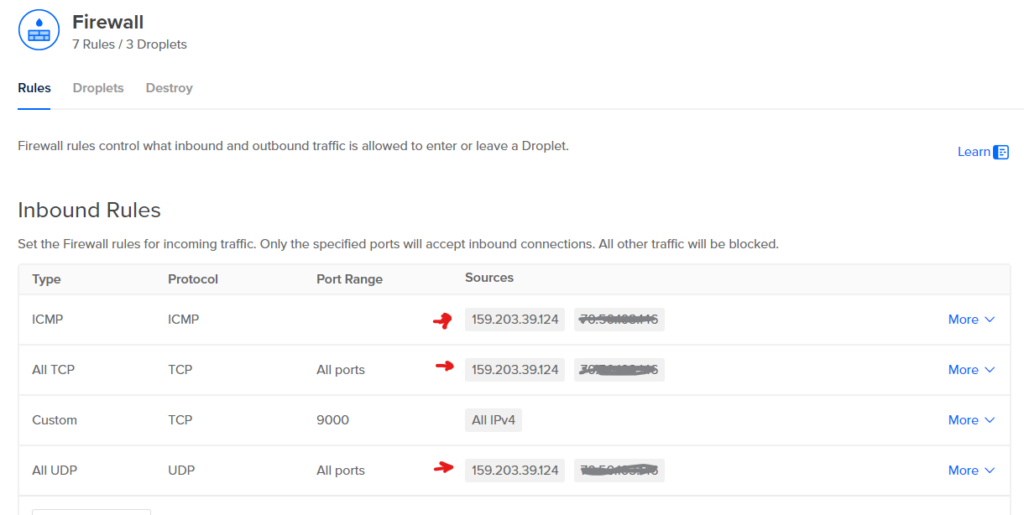
Once IP has been reserved, copy the IP address and add to the firewall rules by going to
Networking > Firewalls > Firewall > Rules > add the reserved IP to the inbound rules like the picture below
SSH into your Ubuntu Droplet VM and update it using:
apt-get update
apt-get dist-upgrade -y
go to Server management > Endpoint Summary > click on deploy a new agent and enter the details of your machine

copy the installation command provided by Wazuh and run it on your VM
wget https://packages.wazuh.com/4.x/apt/pool/main/w/wazuh-agent/wazuh-agent_4.9.0-1_amd64.deb && sudo WAZUH_MANAGER='159.203.39.124' WAZUH_AGENT_NAME='ubuvm1' dpkg -i ./wazuh-agent_4.9.0-1_amd64.debstart the Wazuh agent service
sudo systemctl daemon-reload
sudo systemctl start wazuh-agent
sudo systemctl enable wazuh-agent
We should now be able to see our ubuntu machine onboarded by the Wazuh Manager

Configuring Rule in Wazuh Manager to alert for SSH severity 5 or higher events
Go to Server management > Rules > Custom rules > local_rules.xml and click the edit button under Actions

Copy and paste the following rule > save the changes > click restart manager
<group name="ossec,syslog,sshd">

<rule id="100010" level="5">
   <if_sid>5710,5716,5758,5760,5762,2502</if_sid>
   <match>^failed|error: PAM: Authentication|^error: maximum authentication attempts exceeded|Failed keyboard|authentication error|Connection reset|more authentication failures;|REPEATED login failures</match>
   <description>SSH brute force attack detected/Too many attempts were missed</description>
    <group>authentication_failed,</group>
    <mitre>
      <id>T1110</id>
    </mitre>
</rule>

</group>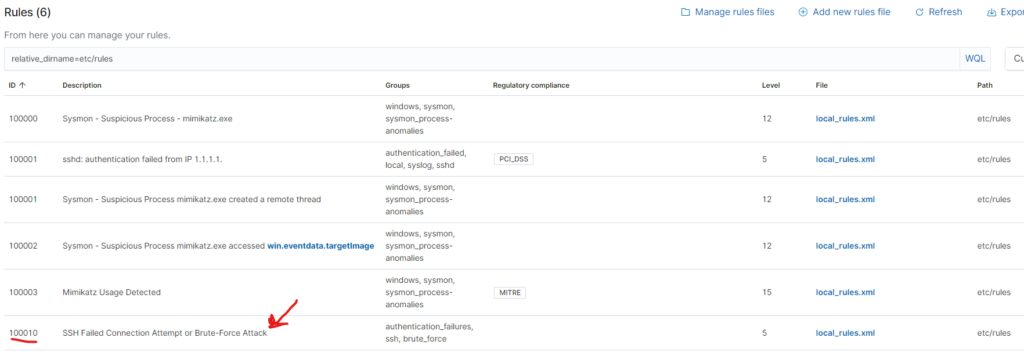
Now we can test by using putty to connect with ssh and entering the wrong credentials, this way we should get alerts on our Wazuh Manager based on the rule we just configured, and we can see we are successfully picking up the failed attempts on Wazuh Manager


Shuffle Automation
We will create a new workflow and call it SOC Automation Project 2
On the Workflow page we will drag Webhook option from the left bar and drop it on the main screen, for the webhook we will name it Wazuh-Alerts
Click on the “Change Me” icon and make sure “Find Actions” is set to Repeat back to me, also on the “Call” section click the add button and select Execution Argument as shown below and click the save button to save the workflow

Now we need to ssh into our Wazuh Manager, we need to tell to connect to Suffle by adding an integration tag on the ossec configuration file located at
/var/ossec/etc/ossec.conf we can use the following template
<integration>
  <name>shuffle</name>
  <hook_url>http://<YOUR_SHUFFLE_URL>/api/v1/hooks/<HOOK_ID> </hook_url>
  <level>5</level>
  <alert_format>json</alert_format>
</integration>
In this case we want to forward level 5 events, save and exit the ossec.conf file by pressing Ctrl + O to save, and Ctrl + E to exit

now we can restart our wazuh-manager.service on the wazuh vm droplet like so, and also verify the status to make sure it’s active (running)

Head back to our Shuffle Workflow click on the Webhook and click on start as seen below
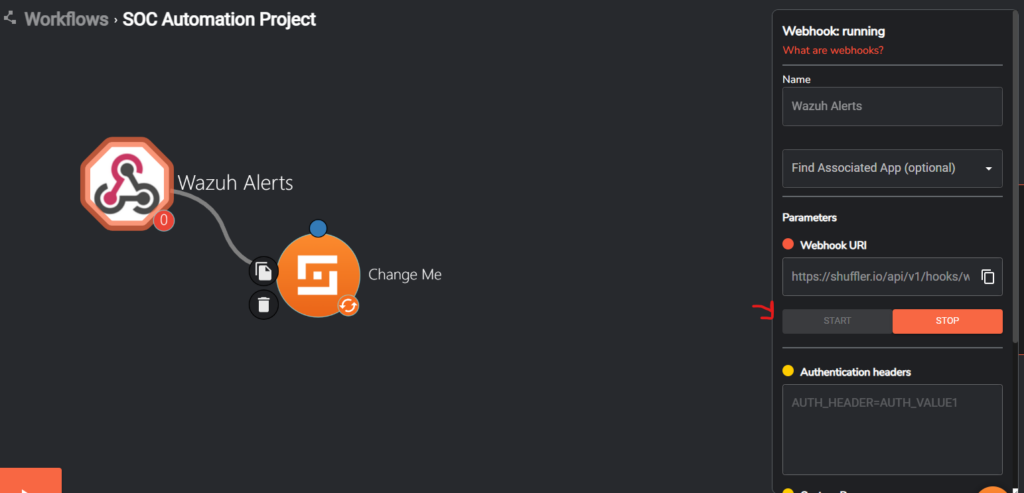
Now we will go ahead and test by click the play button to run
You might have a popup window appear asking what input you want to use previously used arguments if so select the one that contains ssh or login failed

As we can see we were able to get the output for the ssh bruteforce alert
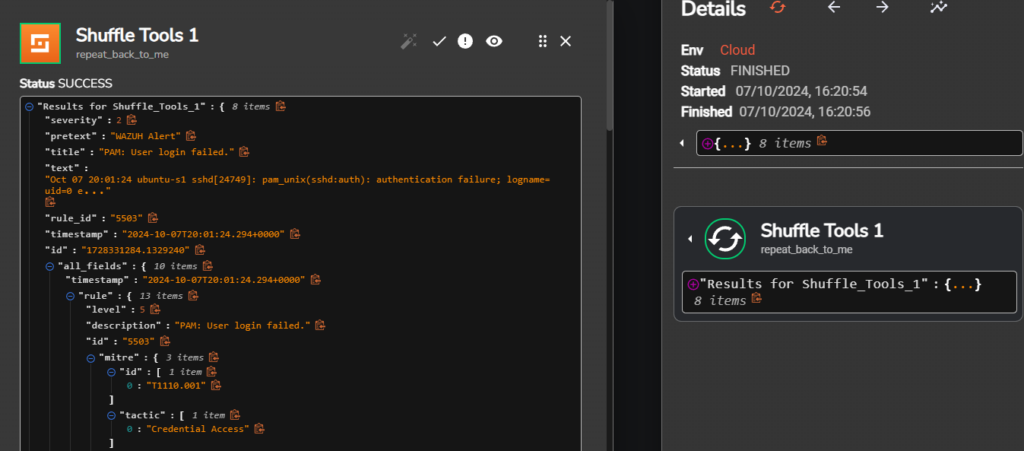
Create an inbound firewall rule on Digital Ocean to reach port 55000, 1514, 1515 which is needed to reach Wazuh API and for agent communication with Wazuh manager
We will now create a firewall rule to allow traffic inbound on port 55000
On Ocean Cloud go to Networking > Firewalls > Firewall > Select New Rule
use the following configuration Custom TCP 55000 All IPv4
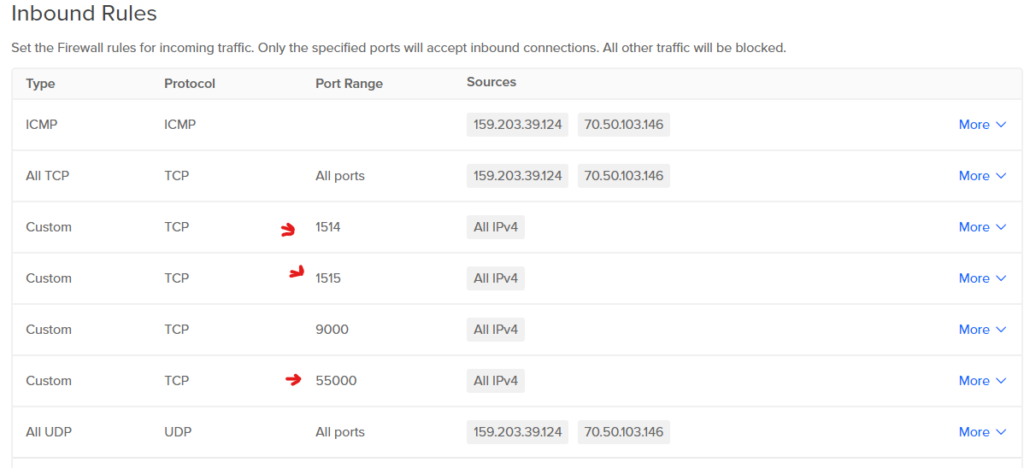
Now we need to create a user account that can be used by Shuffle to communicate with our Wazuh Manager API
We will go to Server Management > Security > Users > click Create user
fill in a username and password as seen below, we will need to give administrator role as this will allow Shuffle to automate actions on Wazuh

The following step will allow Shuffle to authenticate as the user we created in order to use the Wazuh API to perform actions.
Now we need to go back to Shuffle, on the left menu look for the http app drag and drop it to the main workflow area
Select it, we will call it Get-API, under Find Actions select curl and for the Statement enter the following curl command, make sure you change USER:PASSWORD for your username and password created to previously for reaching the Wazuh API, also replace wazuh-api for the ipaddress of your Wazuh Server, once configured make sure to save the workflow
curl -u USER:PASSWORD -k -X GET "https://wazuh-ip:55000/security/user/authenticate?raw=true"
VirusTotal IP get an IP address report
We will now configure VirusTotal to extract attacker IP and enrich the data
on the active apps search bar type virustotal, add it to your apps and drag and drop it on the main workflow dashboard

select it on the authentication parameter click on add and enter your VirusTotal API
on the Find Actions parameter select Get an IP address report
on the IP parameter enter $exec.all_fields.data.srcip

User Input (email analyst to block or not attacker IP)
on the active apps search bar type user input, add it to your apps and drag and drop it on the main workflow dashboard

Select it, on the information parameter enter the following, as choose the email option and enter the desired email to receive alert and input choice, when done click save icon to save the workflow configuration
$exec.title detected from $exec.all_fields.data.srcip at $exec.timestamp on $exec.all_fields.predecoder.hostname
Would you like to block possible attacker IP from reaching target machine?

Setting up Wazuh app on Shuffle
On the main dashboard we want to have the following apps setup as seen below so go ahead and add virustotal app and wazuh app and connect them.

For example
On the search active apps type in Wazuh, select it from the results, once installed drag and drop it to the main dashboard of the workflow, do the same for the VirusTotal app

Click the Wazuh app and we will configure in the following manner,
for name you can keep Wazuh_1, for Find Actions select Run command, for Apikey click on the plus symbol and select Get-API, for url you should enter the ip address for your Wazuh server on port 55000, for Agents list enter the agent number you can enter $exec.all_fields.agentid, for Wait to complete you can enter True


Before continuing with they Body parameter we must go back to our Wazuh VM manager console, go ahead and SSH into your Wazuh VM, you can do this by using putty and entering the IP address of your VM.
Once logged in type in
nano /var/ossec/etc/ossec.congenter Ctrl + W and type in Active Response to get to the active response section,
In this section there are a number of pre-built response commands, we will be using the firewall-drop command, which will modify the IP tables of the Ubuntu VM dropping traffic

scroll down to the activre-response section shown below

we will add the following command, which will drop any level 5 alert traffic on the local machine (ubuntu), press Ctrl + O to write out(save) the new configuration and once saved press Ctrl + X to exit the config file.
  <active-response>
    <command>firewall-drop</command>
    <location>local</location>
    <rules_id>100010</rules_id>
    <timeout>no</timeout>
  </active-response>
Now go ahead and restart the Wazuh Manager service for changes to apply by running
systemctl restart wazuh-manager.service
Now we can go back to Shuffle, click again the Wazuh app, and we will scroll down to Body, click on the expand button, enter the following
{
  "alert": "${{"data":{"srcip":"$exec.all_fields.data.srcip"}}}",
  "arguments": "${arguments}",
  "command": "${firewall-drop0}",
  "custom": "${custom}"
}
Testing Automation

We will SSH to our victim machine which is the Ubuntu VM droplet
We will use putty to SSH to it and also run ping command from it from the attacker machine


In the putty SSH session to our victim machine we will enter wrong credentials to trigger our automation

As we can see we are getting an email with details such as attack name, source IP, timestamp and host name
In addition we have the ability to block the attacker IP, which what we did in this case by selecting the TRUE option in the email

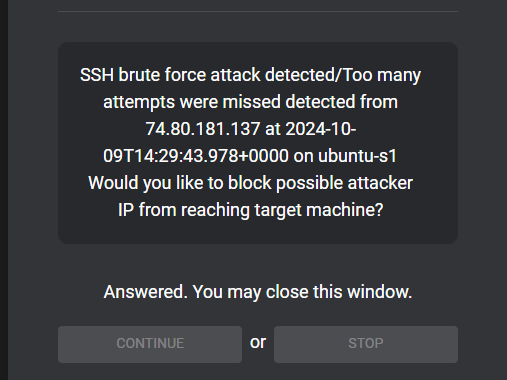
Now that we have actioned the block automation in Wazuh we will go ahead and test pinging the victim machine from the attacker machine and we can see that all the packets are getting dropped.

we can investigate further in our victim machine and we can see our automation worked, shuffle was able to reach the Wazuh Server and apply the firewall drop policy on the victim machine, effectively adding the attacker IP address to the drop policy.

