Configuration
Storage Account
- Not needed but used to store boot diagnostics
Public IP
- To be able to reach this VM from outside
Network Security Group
- Block access to only allowed ports
Virtual Network
- For virtual machine to run inside of
Network Interface (NIC)
- IP addressing configuration for the VM
Virtual Machine
- Virtual machine we are deploying
Creating the Template
Under resources we will type arm-vm-win and we will select the windows virtual machine option

This should populate a template with the components we specified previously such as storage account, public ip, network security group, virtual network, network interface, virtual machine

Things we are interested in changing from template
Storage Account
- Name
- Sku

Public IP
- Change name
- Set Public IP to either Static or Dynamic (changes every time we turn the VM on or off)
Change the dnsSettings > domainNameLabel, this will be the DNS name translation for the IP we get assigned

Network Security Group
Acts as a Firewall for the Virtual Network based on IP address and ports, it allows or blocks traffic depending on the rules configured.
- Suggestion: change the sourceaddressprefix to your public IP address to only allow your IP to be able to RDP the VM and avoid attacks from malicious agents.

Virtual Network
The local network or LAN for your VM, a segmented localized network of your cloud were your VM is located.
The “dependsOn” parameter will check if those resources exist first! Before proceeding forward. In this case dependsOn will check if there is a network security group before continuing with the Virtual Network deployment.
- AddressSpace>addressprefixes this is the address range for the virtual network
- Subnet name
- Sunned > addressprefixes this will be the range for the subnet
- Networksecurity>id this is the network security group we want to apply for the subnet

Network Interface (or NIC)
This is the NIC we are attaching to our machine, so that it is able to get a private and public IP address.

Virtual Machine
Here we can specify anything pertaining to the virtual machine we want to deploy such as VM name, VM size, OS username and password, OS image we will use for the VM, OS Disk, network interface, diagnostics.

Deploying ARM template via Azure CLI
We can deploy our VM ARM template using powershell with Azure CLI
In this case my Azure CLI is already paired with my azure tenant so I can just deploy the template file with the parameters file using the following command.

We can see deployment was completed successfully

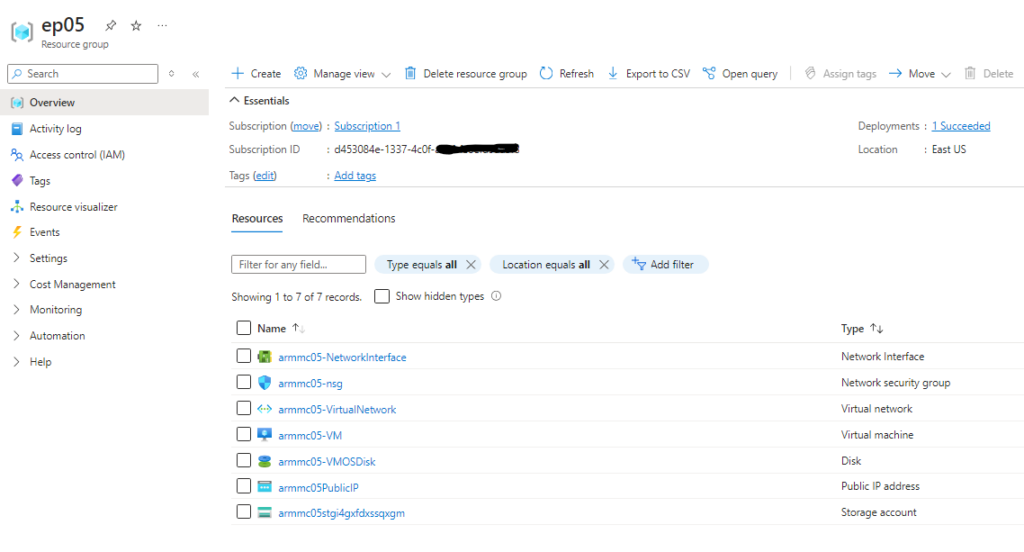
On azure resource group was created with all the resources specified in the ARM template

We will test connecting via RDP to the public IP of our deployed VM


We have successfully connected to the Azure VM.

